
|
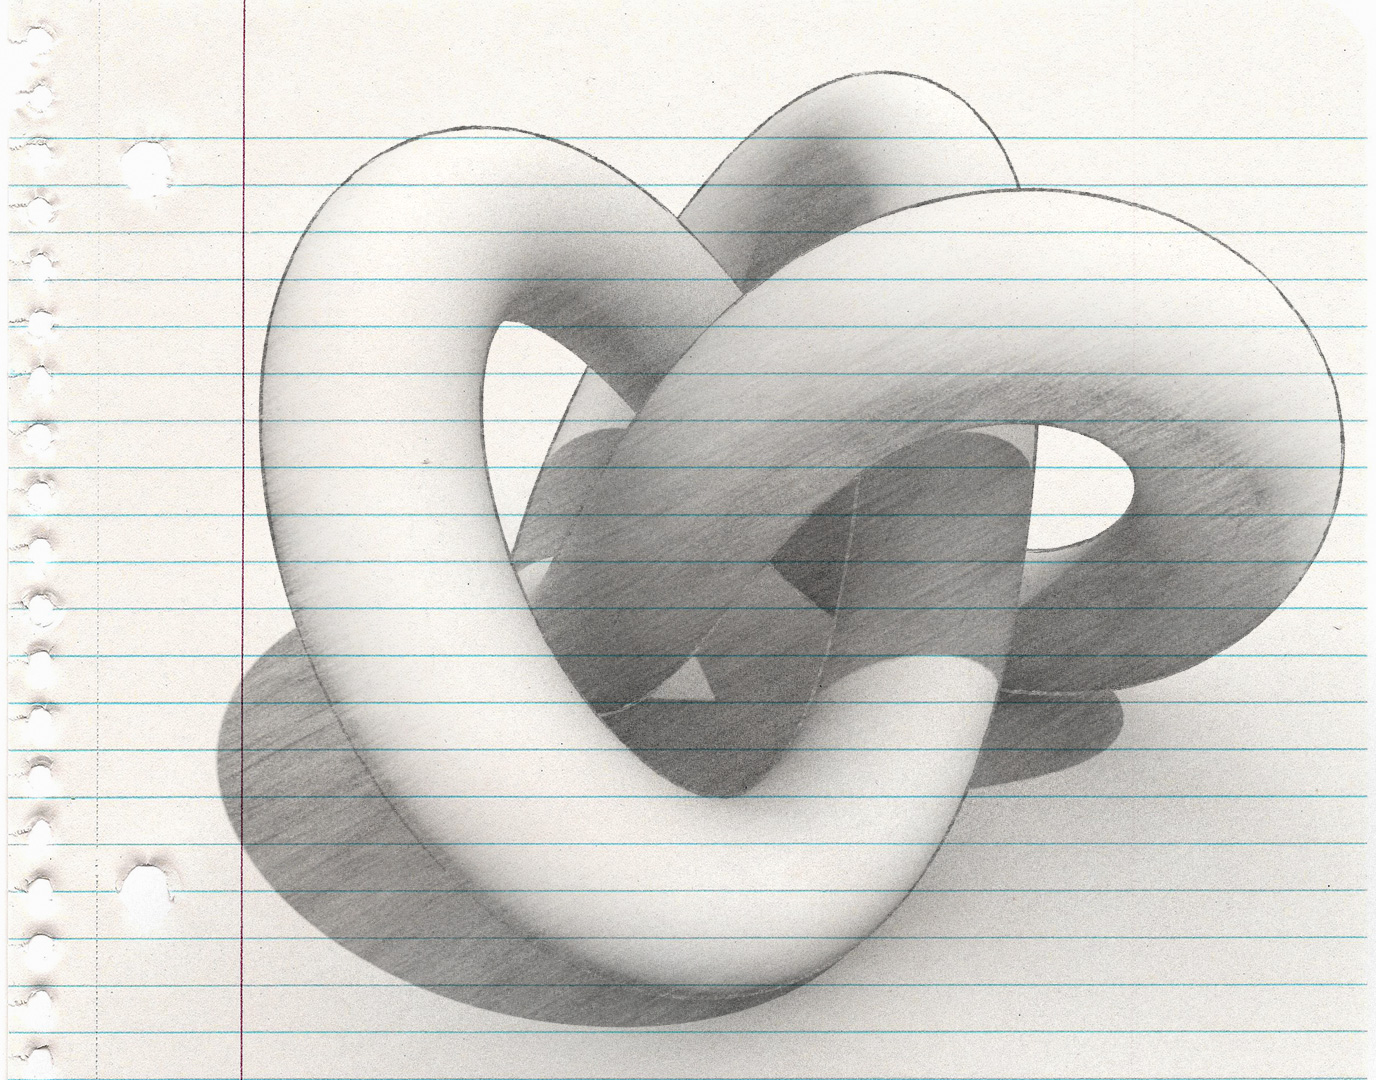
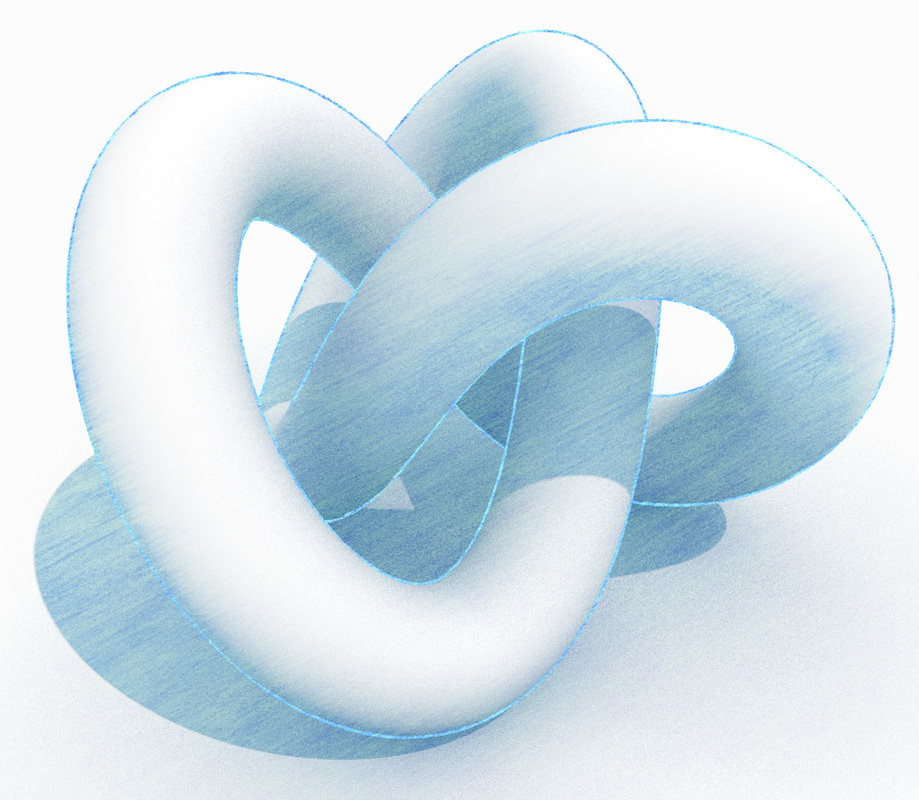
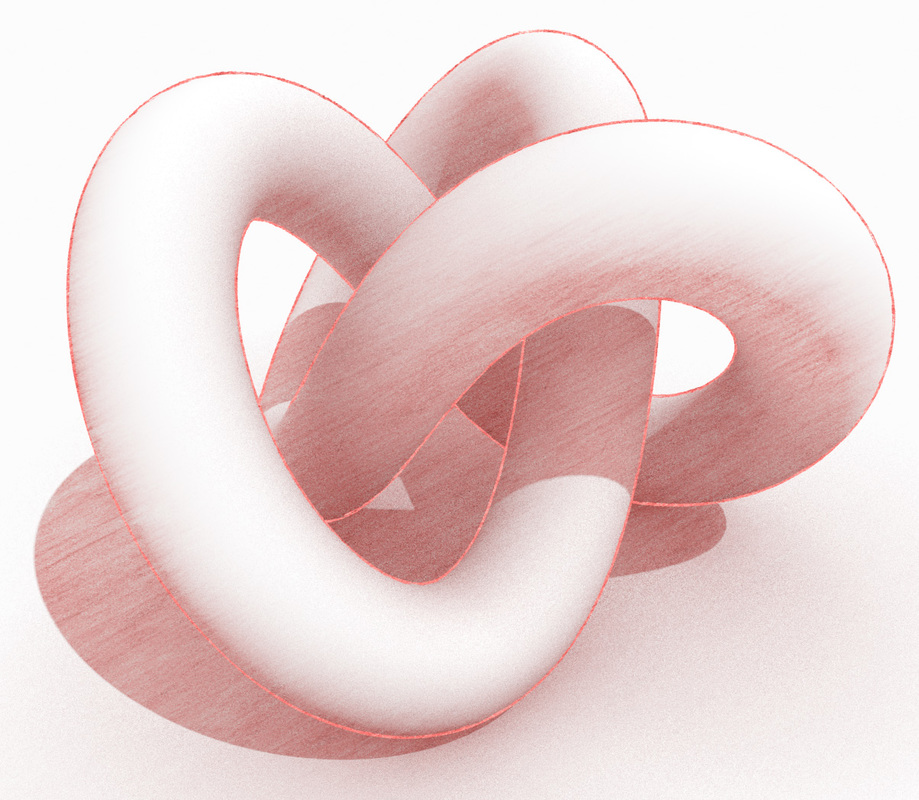
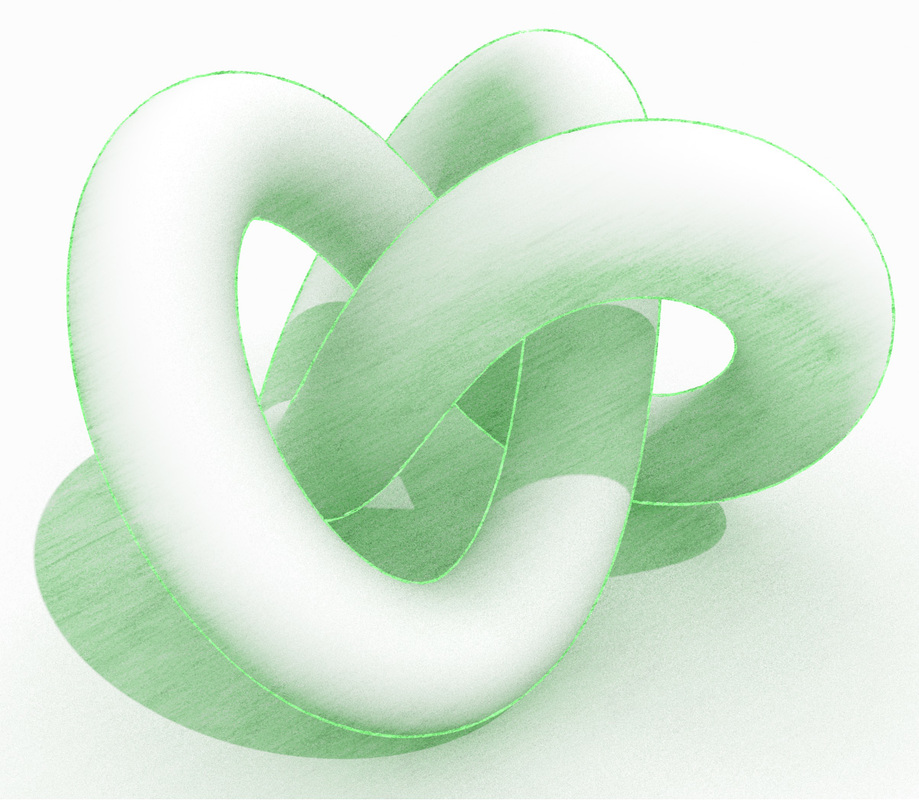
V-Ray 3 Graphite MaterialThis is a work-in-progress tutorial on how to create a graphite hatching effect in 3ds Max using V-Ray.
Tools used in this tutorial: 3ds Max 2017 V-Ray 3.40.01 Warp Texture While I'm using V-Ray 3.40.01 in this tutorial, any version that supports VRayToon and VRayDirt should work. The Warp Texture map is a free plugin that warps a map using another map. It can be found on www.MaxPlugins.de for 3ds Max 5 and above. |


Float Scripts
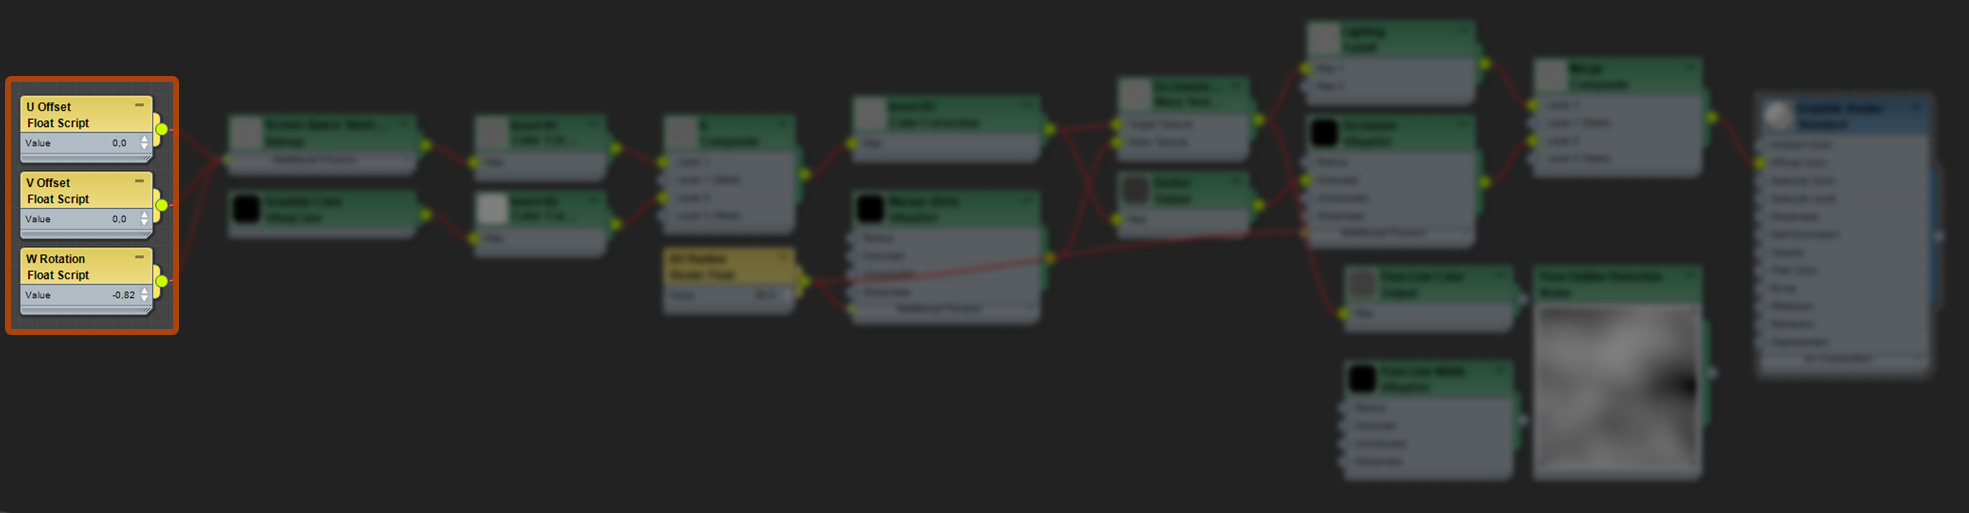
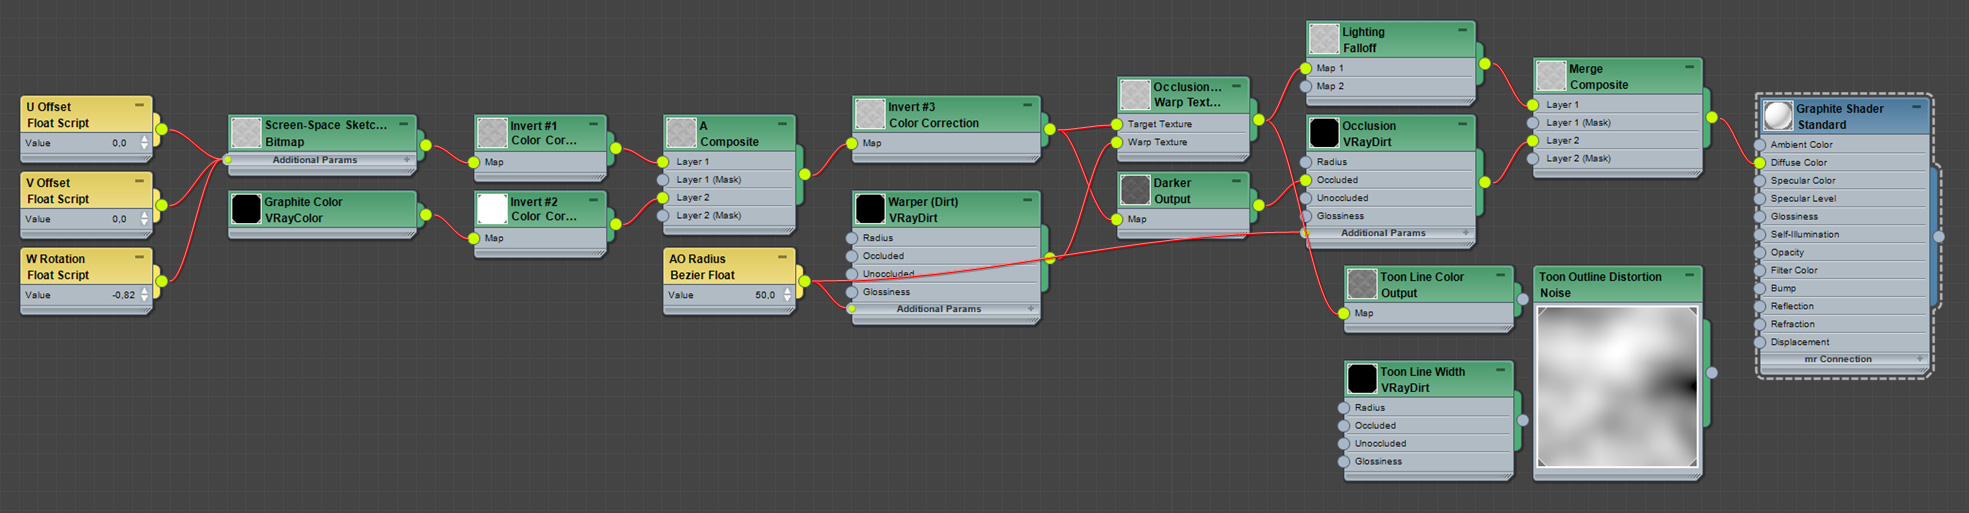
Let's start off by creating the randomizer script controllers.
These three Float Scripts are responsible for randomizing the graphite sketch/hatch texture every frame.
Technically, the U and V offset could use a single controller in this case as the scripts are identical.
These three Float Scripts are responsible for randomizing the graphite sketch/hatch texture every frame.
Technically, the U and V offset could use a single controller in this case as the scripts are identical.
U/V Offset
W Rotation
Values are set to default values at frame 0 to produce consistent results in still image renders.
The rotation value is expressed in radian. The exact values of the W Rotation will depend on your bitmap texture and how much you want to rotate it.
-0.82 radian is about -47 degrees. You could use DegToRad(-47) for defVal and DegToRad(1.72) for varVal if you want to work with degrees instead.
The rotation value is expressed in radian. The exact values of the W Rotation will depend on your bitmap texture and how much you want to rotate it.
-0.82 radian is about -47 degrees. You could use DegToRad(-47) for defVal and DegToRad(1.72) for varVal if you want to work with degrees instead.

Graphite Hatch Texture
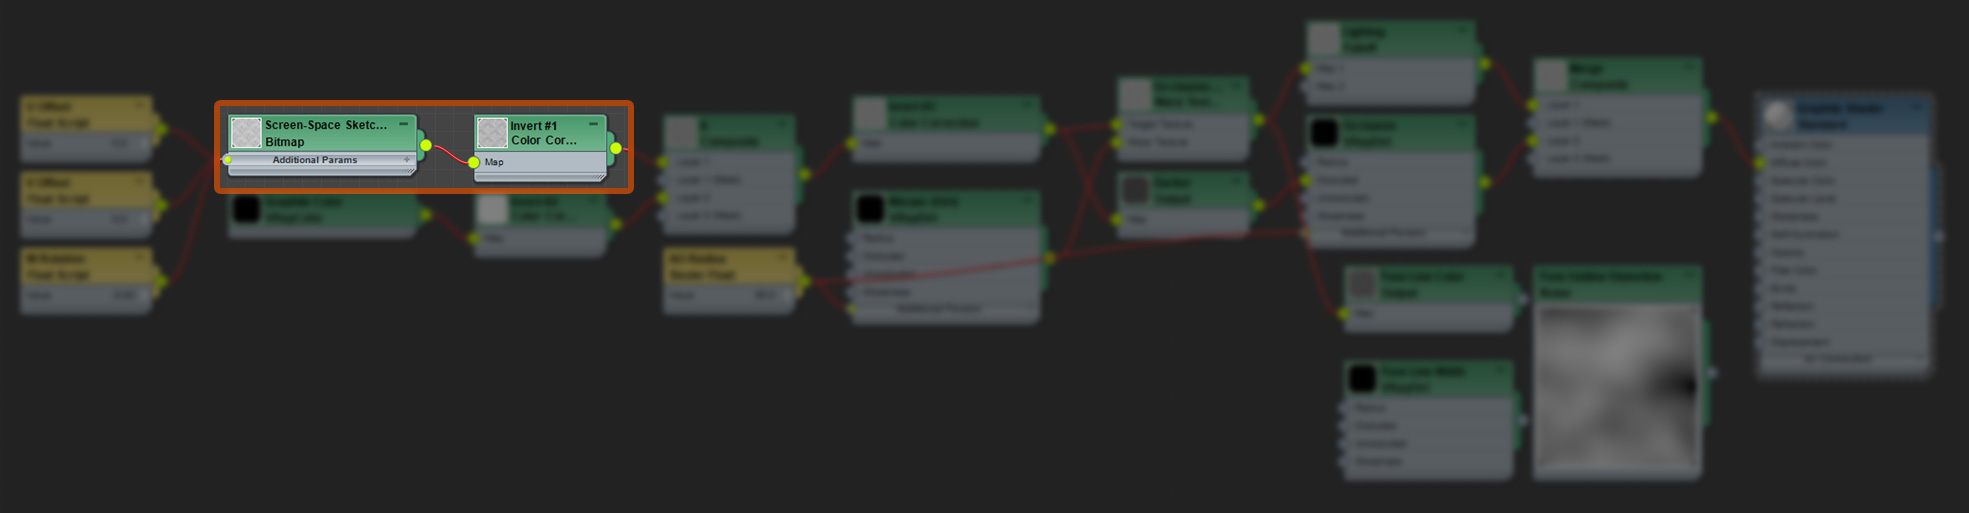
This is the only bitmap used for the graphite effect. Insert your favorite black-white hatching texture and assign Environment under Coordinates.
Mapping should be set to Screen. Don't forget to link the Float Scripts to their respective properties.
The bitmap should be seamless in all directions for best effect. Tile the bitmap as needed.
Mapping should be set to Screen. Don't forget to link the Float Scripts to their respective properties.
The bitmap should be seamless in all directions for best effect. Tile the bitmap as needed.

Invert the bitmap with a Color Correction map.

Graphite Color
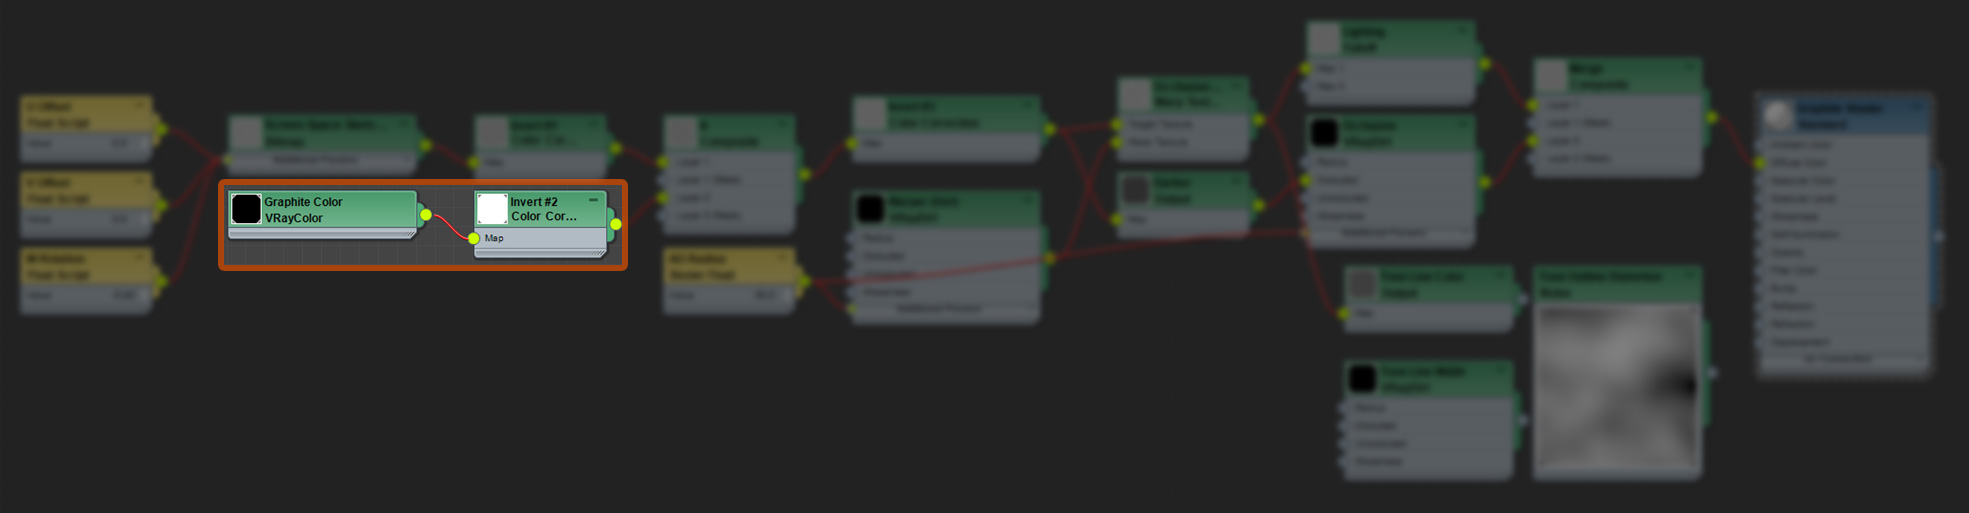
Create a VRayColor map. This will be our graphite color controller and will tint the graphite effect globally. Leave it black for now.
Invert the VRayColor with another Color Correction map.
Invert the VRayColor with another Color Correction map.

Bitmap Tint
The reason we inverted the color of the bitmap and color in the previous steps is because we're working with a black and white image where we want to colorize the blacks and leaving the whites as it is, but because we can only colorize whites we had to invert the bitmap, and since we have to revert the bitmap back again afterwards, we had to invert the color before the composite as well to get the correct color output.
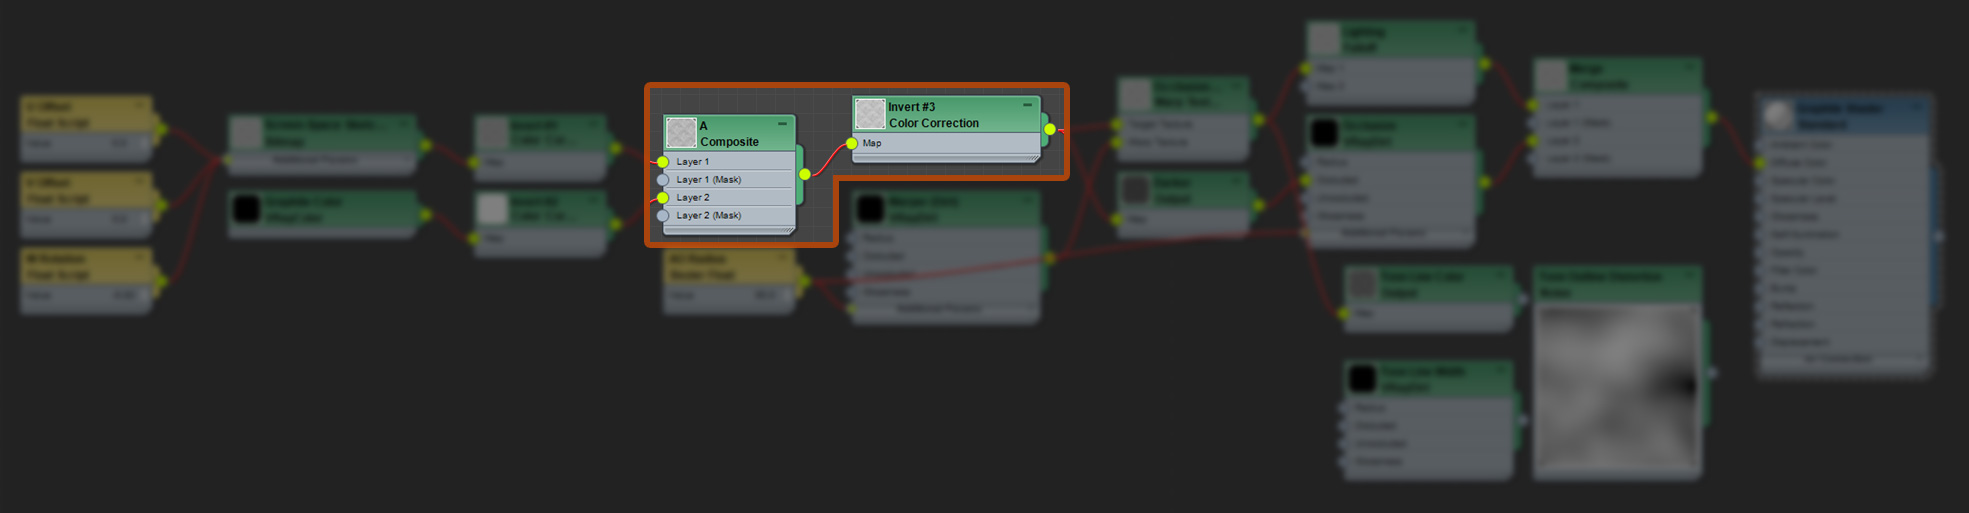
Now create a Composite map and add a new layer. Assign the Bitmap Color Correction as layer 1 and VRayColor Color Correction as layer 2.
Set the blending mode of layer 2 to Linear Burn.
Invert the Composite map with another Color Correction map.
Now create a Composite map and add a new layer. Assign the Bitmap Color Correction as layer 1 and VRayColor Color Correction as layer 2.
Set the blending mode of layer 2 to Linear Burn.
Invert the Composite map with another Color Correction map.

Contact Shadow Irregularity

Let's slightly deform the graphite bitmap near contact shadows. This is done with a normal VRayDirt map connected to a Warp Texture.
Plug the Composite Color Correction map into the Target Texture slot of the Warp Texture map and the VRayDirt map into the Warp Texture slot.
Plug the Composite Color Correction map into the Target Texture slot of the Warp Texture map and the VRayDirt map into the Warp Texture slot.

Graphite Texture Lighting

Let's limit the graphite effect to shadows and unlit surfaces. We want bright surfaces to remain "un-sketched".
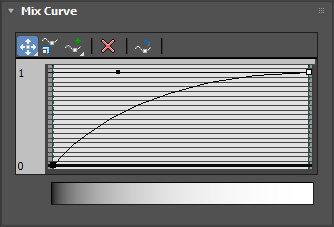
Create a Falloff map and set the Falloff Type to Shadow/Light.
Assign the Warp Texture map as Map 1.
Adjust the Falloff Mix Curve to something like this:
Create a Falloff map and set the Falloff Type to Shadow/Light.
Assign the Warp Texture map as Map 1.
Adjust the Falloff Mix Curve to something like this:

Ambient Occlusion

Darken the Composite Color Correction map using a Output map.
Create a new VRayDirt map and plug the Output map into the Occluded map slot.
Create a new VRayDirt map and plug the Output map into the Occluded map slot.

Graphite Material
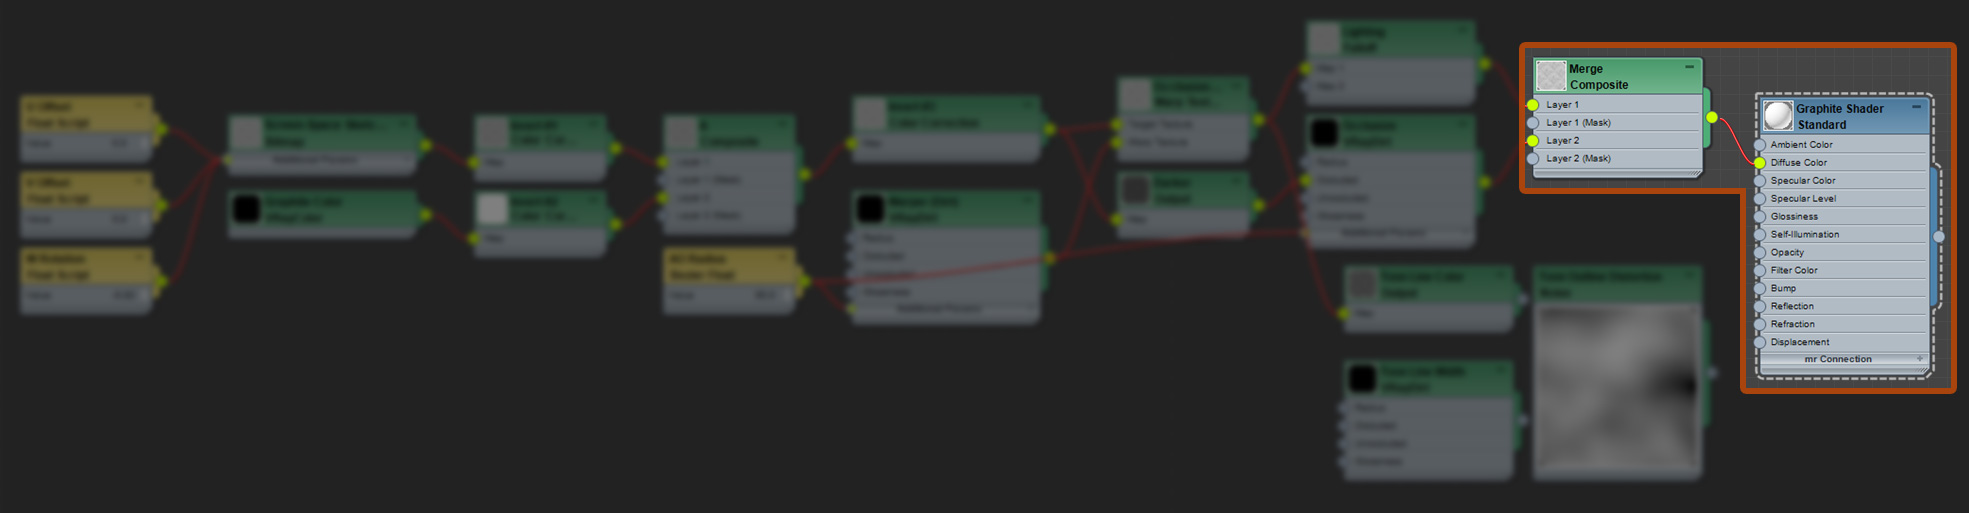
Combine the ambient occlusion and lighting maps with a composite map.
Add the Warp Texture Falloff to Layer 1 and VRayDirt to layer 2. Change the Blending Mode of layer 2 to Multiply.
Create a new Standard Scanline material and assign the Composite map to the Diffuse Color slot.
Set Self-Illumination to 75%.
Assign the material to your entire scene using the V-Ray material override option.

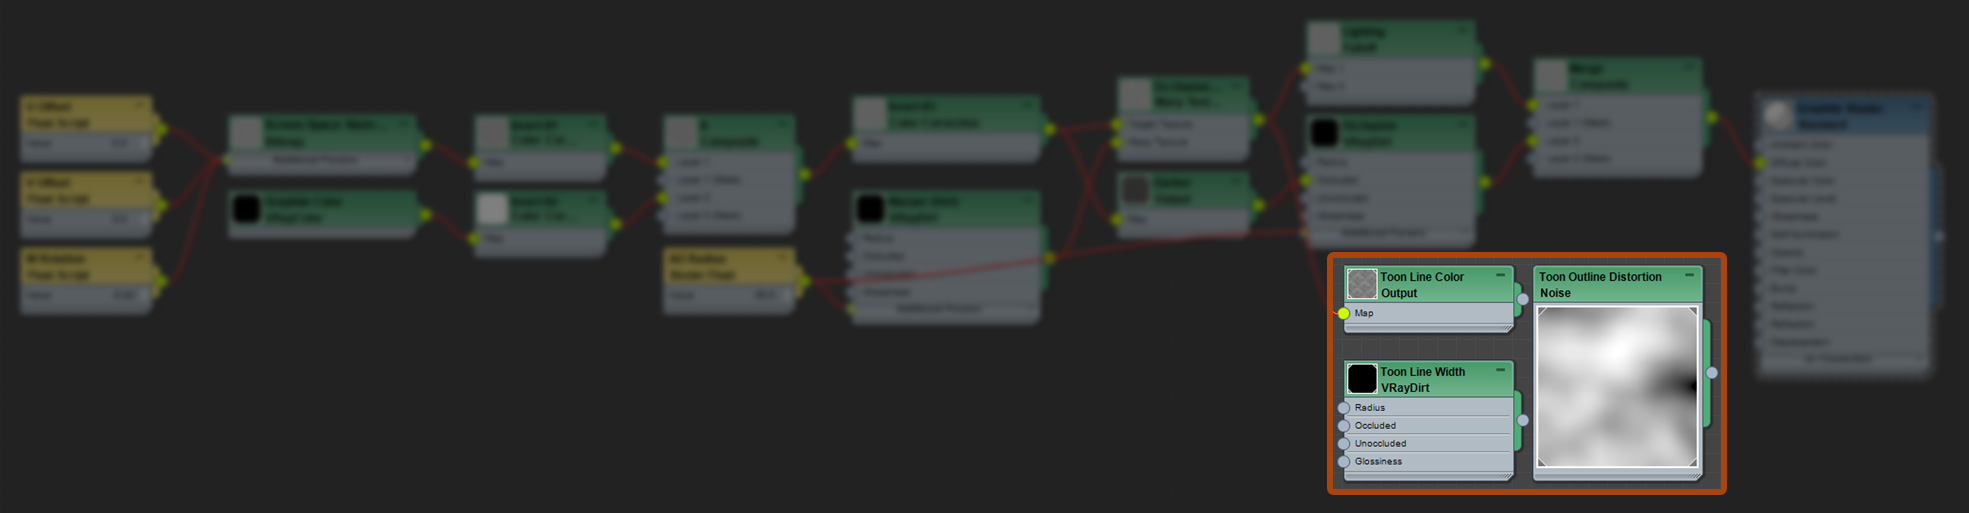
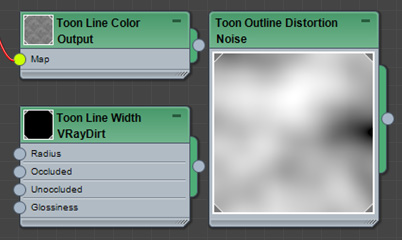
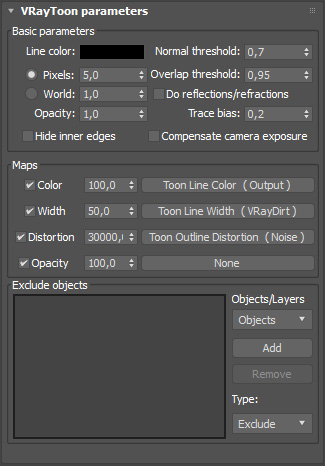
Outlines

Final Thoughts
Note to self: Insert delicious thoughts here.

