
Just a updated image to show some progress. Now trying to get the folds look right.
|
|
|
Just a updated image to show some progress. Now trying to get the folds look right.
0 Comments
Mandatory Project 2 • Find a piece of text from a pre-1960 story about gangs. • Be influenced by this chosen text to design a character that looks part of a 'gang' of other characters. • Present your final character design in a model sheet. • Model a minimum of three accesories from your character design. One accessory must be footwear (or barefoot). • In the model sheet include renders of accesories (2d and 3d elements) and visualization of character analysis. • Complete a minimum of one (1) full colour hyper-linked reflective journal post. Brainstorming So after two days of brainstorming going through multiple countries and ages, I finally decided to design a Norwegian viking for my character assignment. So, basically, he's a young boy living in Norway around the year 1000. He's the son of the town's blacksmith and his dream is to become a mighty viking warrior when he grows up. This character was inspired by the story of Olaf Tryggvason, who was the king of Norway from 995 to 1000. Click the button below to read the whole story. I know it's not a story directly about a gang, but rather the story about a person from a gang. For the accessories, I've been modeling a helmet, an axe and a leather boot. 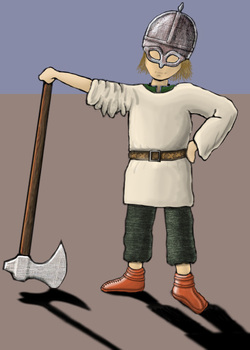 Front view WIP 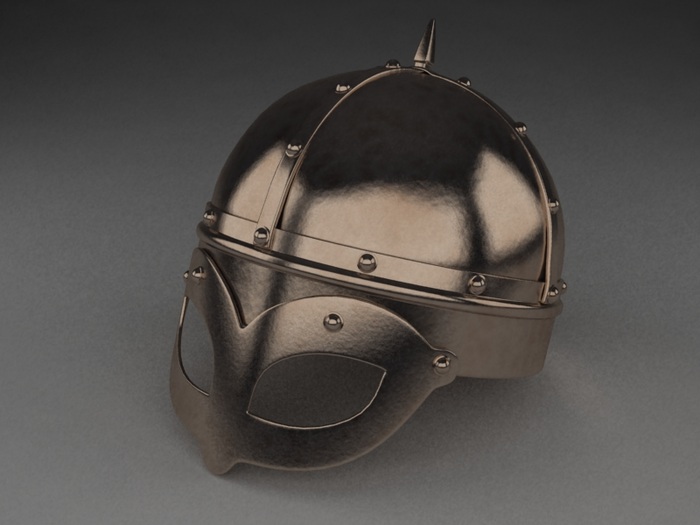 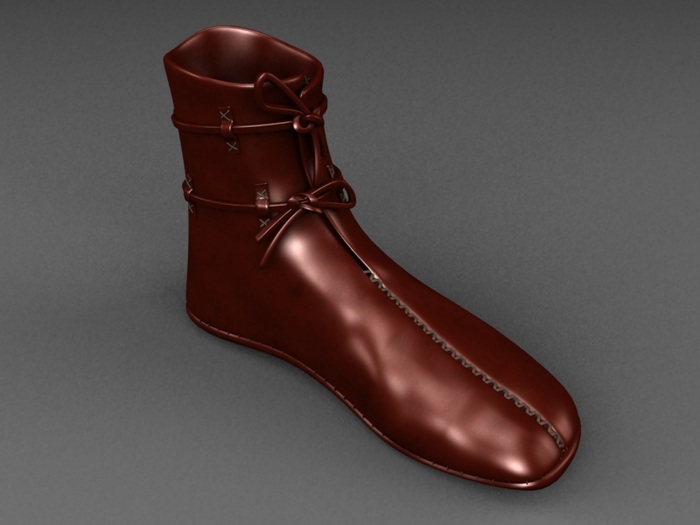   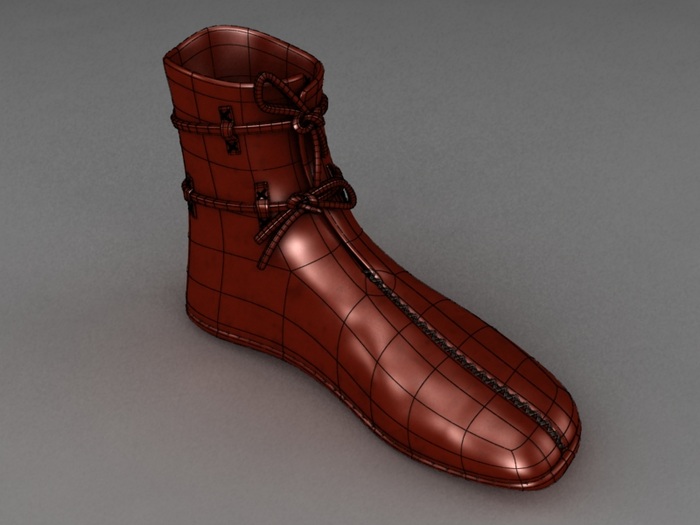  Vikings
The term Viking is customarily used to refer to the Norse (Scandinavian) explorers, warriors, merchants, and pirates who raided, traded, explored and settled in wide areas of Europe and the North Atlantic islands from the late eighth to the mid-11th century. I've then applied the finishing touches to the animation and done a lot of Curve Editor and Dope Sheet work to get it all to run seamlessly. After some timing adjustments along the final process, the animation length finally settled at 410 frames - which is almost 100 frames longer than my initial block. 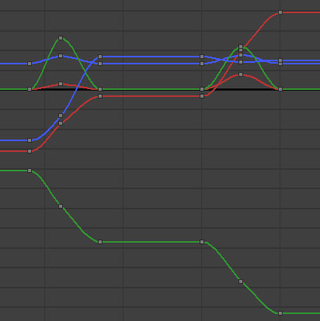 The Curve Editor. 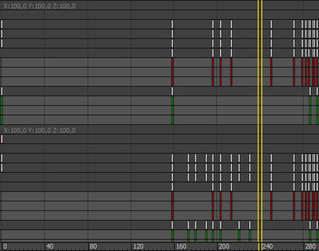 The Dope Sheet is a way more organized way to edit and scale keys.  Keys, keys, keys. It gets chaotic after entering the final animation pass. I've also added a nice squish and a toon smoke effect (kinda inspired by Worms) to the cannon for a greater force impression. The smoke effect is nothing but a bunch of animated geospheres, moving and scaling down to invisibility over time. Also have a animated Falloff shader in the render. 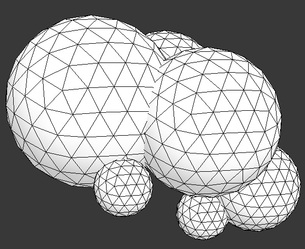 HD RenderIn conclusion - I'm satisfied with the end result all things considered. I could probably have added some more weight to the cannonball seeing that the assignment states the object should be "very heavy" and not just "heavy" as in my case, and maybe a stronger anticipation before the first lift.
I'm now in the process of finalizing the animation using the example found in The Animator's Survival Kit book by Richard Williams as a template to get the back arc right in my various situations. Here's a preview of my current progress. 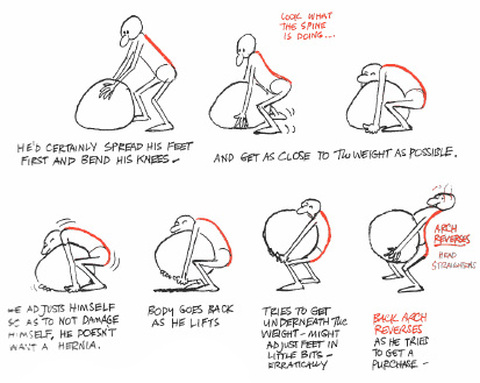  A few annoying gimbal locks has appeared and are making the rough animations a pain in the arse. I've been able to fix the worst locks by switching over to inverse kinematics animations while lifting the cannonball. Also, up until now I've been trying to animate the cannonball as a standalone entity, but manually adjusting the speed and position is too tedious of a job. Therefore, I'm now going with a link constraint solution together with the IK animations. This combination seems to work out great so far. I suppose the gimbal locks could've been avoided with a change in the euler rotation order, but what the hell, this is a better solution by far. 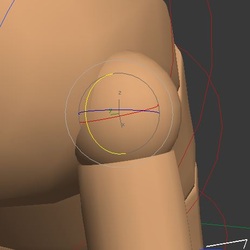 Odd movement arcs will occur. Otherwise, the rough stage is coming together nicely.
I'm by now pretty much done blocking out the animation. I just need to adjust the key poses and the timing before going on with the rough animation. I will most likely have to adjust the timing further as I progress through the rough as I can never seem to get the initial timing right... Need some practice on that. The way I created the block animation was I moved the rig into the selected key poses at every 5 frames and then later spaced the poses apart, trying the best I could to get the right timing between the poses. Blocking was all done with step keys which will later be changed to auto keys and adjusted upon starting on the rough.  For our first mandatory project we are to "create a full-body, final, personality lift animation using a rig of our choosing". For my animation I will be animating some dude loading a heavy cannonball into a nearby cannon, much like the clip below. The character is curious about the cannon and want to try and load a cannonball into it. He know he's not allowed to do this, so he has to make sure no one's around before moving on. It all ends with him taking the cannonball to the face, sending him flying out of the frame at the speed of light - all because he's too curious for his own good. I have chosen the Max rig for this specific task because it seems like a really nice and clean rig to work with. In this clip, the cannonball seems to loose weight in the throw. So, instead of throwing the ball into the cannon, I want my character to carry it to the cannon and then lift it into the barrel. Here's a quick storyboard demonstrating it: 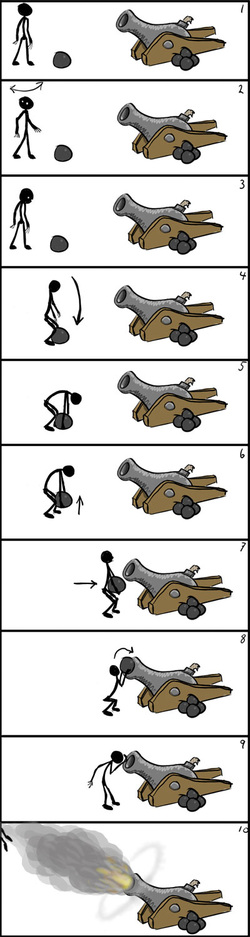 1. Just standing there, looking at the cannon and the cannonball in front of him. 2. Quickly looks around to ensure he's alone. 3. Looks back at the cannonball and begins to move towards it. 4. Getting ready to lift up the cannonball. 5. Getting a good grip before lifting. 6. Starts lifting. 7. Carries the ball towards the cannon, stopping right in front of the barrel. 8. Lifts the ball into the cannon and pushes it down the barrel. 9. Looks down the barrel to see what's happening to the cannonball down there. 10. Cannon suddenly fires, sending the rig flying. For the actual lift of the cannonball into the barrel I'm looking for something like in the following videos: 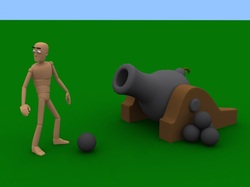 Current Scene Having played a lot with LEGOs back in the days, I thought it would be cool to create a digital LEGO model within 3ds Max. I'm not entirely sure about what I'm going to build out of this yet, but in the meantime I've started modeling some of the most widely used bricks.  Clay Render  Wireframe The bricks are all polygon modeled using simple yet effective geometry. Shapes and scale ratios are more or less identical to the real thing. 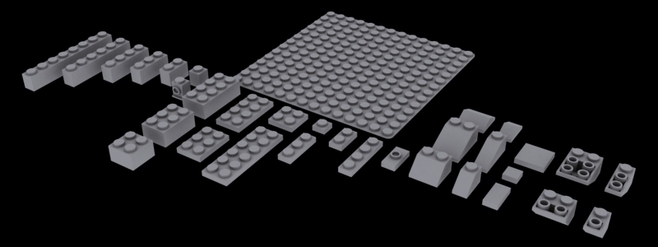 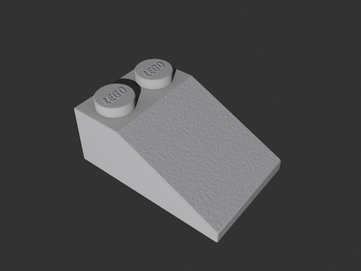 Bump and displacement maps makes for the final surface touches.
The current shader is based on MR Arch & Design Matte Plastic. I'll try to create a SSS solution later for added realism. |
 About the authorOle Kristian Busk Archives
August 2018
|
 RSS Feed